 Heat shrink tubing is one of the most versatile and reliable solutions for protecting and insulating electrical connections, wiring, and mechanical components. Whether used in industrial, automotive, or marine environments, proper use of heat shrink tubing ensures long-term durability and safety. At Nu-Tech, we provide high-quality heat shrink products designed for performance and reliability — but to get the most out of them, it’s essential to understand how to choose and apply them correctly.
1. Choose the Right Material
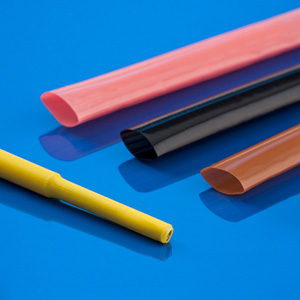
Heat shrink tubing comes in a range of materials, each suited for specific environments and applications:
-
Polyolefin: The most common and versatile option; excellent for general electrical insulation, strain relief, and environmental protection.
-
PVC: Offers rigidity and chemical resistance but is less flexible.
-
Fluoropolymer (PTFE, FEP): Best for high-temperature or chemical-resistant environments.
-
Adhesive-lined (dual wall): Combines mechanical protection with a water-resistant seal, ideal for outdoor or marine applications.
Before purchasing, always verify the tubing’s temperature rating and environmental resistance to match your working conditions.
2. Measure Properly
Accurate sizing is key to successful application. Heat shrink tubing typically shrinks to about 50% of its original diameter, depending on the shrink ratio (commonly 2:1, 3:1, or 4:1).
To select the correct size:
-
Measure the largest diameter of the component or connection to be covered.
-
Choose tubing that is about 20–30% larger before shrinking.
-
Ensure it will fully recover to form a snug fit without over-stretching or under-shrinking.
Incorrect sizing can cause poor insulation or leave gaps that allow moisture and contaminants in.
3. Prepare the Surface
For the best adhesion and protection, clean and dry all surfaces before applying heat shrink tubing. Remove grease, dirt, or oxidation using an appropriate solvent. If you’re using adhesive-lined tubing, this step is even more important — the adhesive bonds best to clean, smooth surfaces.
4. Apply Heat Evenly
Uneven heating is one of the most common mistakes when working with heat shrink tubing. To achieve a consistent, professional finish:
-
Use a heat gun rather than open flames, which can burn or damage the material.
-
Apply heat gradually, moving the heat source evenly around the tubing.
-
Begin heating from the center outward to prevent air bubbles from forming.
-
Watch for color or gloss changes that indicate proper shrinkage.
If using dual-wall tubing, heat until the adhesive flows and seals the connection completely.
5. Consider Environmental and Safety Factors
When selecting and installing heat shrink tubing, think about the long-term conditions it will face:
-
Temperature fluctuations: Ensure the material’s operating range fits your environment.
-
Exposure to chemicals or UV light: Use specially rated tubing for chemical or outdoor exposure.
-
Mechanical stress: For high-vibration areas, choose thicker or adhesive-lined tubing for added durability.
Always follow safety guidelines, including wearing gloves and eye protection, especially when using high-heat tools.
6. Inspect and Test
After installation, allow the tubing to cool and inspect for uniform shrinkage, proper seal, and any gaps or air pockets. A quick tug test can confirm a secure fit. For critical electrical applications, use an insulation resistance tester to verify performance.
Why Work with Nu-Tech?
At Nu-Tech, we supply premium heat shrink tubing engineered for efficiency, safety, and longevity. Our experts can help you:
-
Select the right material and shrink ratio for your application.
-
Customize tubing sizes, colors, and printing for identification.
-
Source specialty heat shrink products that meet industry standards.
Whether you’re protecting wiring in a high-voltage assembly or sealing delicate electronics from moisture, Nu-Tech ensures your connections are reliable, safe, and built to last.